Installing the My Security app
A carefree journey through the digital world begins with comprehensive protection from the My Security app. Once set up, your identity, devices and passwords are secure.
Good to know
This protects your information and identity against viruses, cyber attacks and data theft:
- Install the My Security app on all devices
- Set up My Security App completely
Installing the My Security app
Install the My Security app on all devices. You have 10 licenses available.
Computer: Windows / macOS
The My Security app combines device and identity protection plus additional features in one app.
- Log on to the computer as an administrator.
- To avoid issues, uninstall other security software first. Go to instructions
- Download the My Security app.(opens in new tab)
- Open the downloaded file.
- Follow the instructions.
Smartphone / Tablet
The My Security app combines device and identity protection plus additional features in one app.
- To avoid issues, uninstall other security software first.
Go to instructions - Download the "My Security App"
To My Swisscom(opens in new tab) - Open the My Security app and follow the instructions.
Uninstalling other security apps
How to uninstall your existing security programs:
Computer: Windows
To avoid issues, remove your current version or other security programs before (re)installing the My Security app.
- Go to your computer’s Start menu.
- Open «‘Settings’».
- Select «Apps» and «Apps & Features».
- Click on the three dots next to the program (Windows 11) or select the program (Windows 10).
- Click «Uninstall».
- Follow the instructions to uninstall the program.
Computer: macOS
To avoid issues, remove your current app or other security programs before (re)installing the My Security app.
- Use the Finder to locate the folder of the program that you wish to uninstall.
- If the program has an uninstaller, always use this to uninstall the program, and follow the instructions.
- If the program does not have an uninstaller, drag the program you wish to uninstall, as well as any associated files and folders, to the recycle bin on your Mac. Keep the files in the recycle bin temporarily until you are certain that your Mac is still working without any problems.
Smartphone: Android
To avoid issues, remove your current app or other security programs before (re)installing the My Security app.
- Open the Google Play Store.
- Tap your profile picture in the top right and select «Manage apps and device».
- Select «Manage» and tick the box next to the app.
- Tap on the recycle bin at the top right and select «Uninstall» to delete the app.
Smartphone: iOS
To avoid issues, remove your current app or other security programs before (re)installing the My Security ap
- Go to «Settings» «General» «iPhone Storage».
- Select the app you wish to delete.
- Tap «Delete App»and the rubbish bin and confirm.
Setting up the My Security app
Set up the My Scecurity app and enter your personal data.
Activate device protection
Device protection scans your smartphone, laptop and other devices for viruses, hacker activity, infected e-mail attachments and other threats.
- Open the My Security app.
- Select «Device Protection».
- Click the «First steps» button and follow the instructions.
Set up fraud protection
Fraud protection recognises legitimate websites and alerts you if a site may be unsafe to visit – for complete peace of mind when shopping online and e-banking.
- Open the My Security app.
- Select «Fraud Protection».
- Click the «First steps» button and follow the instructions.
Set up the browser security extension
The browser extension for the My Security app protects you by providing warnings about unsecure websites.
- Open the My Security app.
- Select the «Browser Extensions» button in the «Fraud Protection» tile.
- Select «Install»in your preferred browser (Chrome, Safari, Firefox, etc.) and follow the instructions in the My Security app. There are different instructions for each browser.
Activate the VPN via the My Security app
The virtual private network (VPN) protects your internet activity and your privacy. You can easily enable or disable it via the main screen in the My Security app:
- Open the My Security app.
- Enable the VPN under «VPN».
- When you activate the VPN for the first time after installing the app, the «VPN set-up» .
- To allow the device to set up a VPN connection, select «Allow» and then «OK»
- Your VPN will start and connect the My Security app to the location that offers the best connection..
To disable the VPN, tap the toggle switch under «VPN».
Enable Wi-Fi protection
When you use Wi-Fi to connect your smartphone to the network, Wi-Fi protection checks if the network is secure and warns you if it is not.
- Open the My Security app.
- In the main screen of the My Security app, select «Fraud Protection».
- Select «Wi-Fi Protection».
- Switch on Wi-Fi protection.
- Switch on «Automatically enable VPN» to always use the VPN if you are connecting to an unsecure or public Wi-Fi network.
- Select the notifications you wish to receive.
Set up password manager as browser extension
Having a password manager in your browser makes it easy to automatically store and retrieve your passwords.
- Open the My Security app.
- Select the «Autocomplete» button in the Password Vault.
- Select the button for your web browser (e.g. Chrome, Windows Edge or Firefox) and confirm the installation.
- Copy the authorisation code to the cache.
- In the open web browser «select the ‘Password Manager by F-Secure» extension..
- Paste the authorisation code from the cache.
- Select «Authorise» to confirm.
The extension will now display the password manager icon next to website logins. Click the icon to automatically insert your password from the password manager.
Sync the password manager on all your devices
Already using the password manager on one of your devices? Then you can connect additional devices as follows and sync your passwords:
- Repeat the installation process on your other devices for them to sync with each other.
- On each additional device, click the password vault and select «I am already a user». Follow the instructions.
- This will apply your passwords and enable you to log in to your accounts via other devices.
Monitor e-mail-addresses for data breaches
The My Security app can automatically monitor up to 10 e-mail addresses belonging to you or your loved ones to find out if they have been compromised in a data breach. Once you’ve added one email address, you can add other important personal data for the app to monitor. User names, phone numbers, credit card numbers, passport numbers and driving licence numbers are just a few examples.
- Enter up to 10 e-mail addresses in the My Security app under «Monitoring».
- You will receive an e-mail from noreply@f-secure.com asking you to confirm the e-mail address you entered.
- If your e-mail addresses are ever compromised, you will receive a notification in the My Security app.
Set up family protection
Safe media use for the whole family: With family protection, you can restrict or block certain content and activities for children using different protection levels.
FAQs
Why can’t I install the My Security app?
Your device needs one of the following operating systems to run the My Security app:
- Windows 10 from version 21H2, Windows 11
- MacOS version 12 (Monterey) or later
- iOS 17.0 or later
- Android 11 or later
32-bit architecture is no longer supported for Windows.
How do I mark a local WLAN network as trusted?
You can allow connections to other devices within the same network while the VPN is enabled. To do so, follow the instructions below to mark your current network as trusted and make sure that the kill switch is enabled (default setting):
Smartphone: Android/iOS
- Open the My Security app.
- Tap «VPN» on the main screen.
- Select the gear icon in the top right-hand corner . The «Privacy VPN settings» screen opens.
- Select «Trusted networks».
- Select «Current network»
Computer: Windows/macOS
- Open the My Security app.
- Tap «VPN»on the main screen.
- Select «Trusted networks». This will display your trusted networks.
- Under «Current networks»define which network you would like to trust using the «Trust network» option.
Important: never mark a network as trusted if it is not password-protected.
What can I do if software is erroneously blocked?
You can remove the block as follows:
Windows:
- Open the My Security app.
- Select «Device Protection» in the main screen of the My Security app.
- Select «Manage scan exclusions». You need administrator rights to access these settings.
- The «Blocked» tab shows all of your blocked applications.
- Select an application followed by «Allow».
- Confirm that you want to allow the application by clicking «Yes».
The application you have selected will be added to the «Excluded»list and allowed to make system changes again.
- In the menu, click the product icon and go to «Settings».
- Select the «DeepGuard» tab.
- Click the lock icon in the lower left-hand corner. You need administrator rights to change these settings.
- Select «Configure DeepGuard»to open the «DeepGuard Configuration’» app.
- Click the lock icon in the lower left-hand corner. You need administrator rights to change these settings.
- In the «DeepGuard Configuration» app, right-click on the rule for the application that you want to allow and then select «Edit».
- Select «Allow» as a rule for the application.
- Select the permissions that you want to allow for the application.
- Finish by clicking «Save».
How can I manually unblock a website if browser security blocks it?
You can allow a website yourself if it does not pose a risk.
Windows:
- Select ‘Allow website on this computer’. You need administrator rights to allow blocked websites.
- The ‘Add allowed website’ window opens and displays the address you want to allow.
- Select ‘OK’.
The blocked website will open. The product will also add the website to the list of allowed websites.
macOS:
- Open the My Security app.
- Select ‘Fraud Protection’ on the main screen.
- Select ‘Manage allowed and blocked websites’.
- Click the lock icon in the lower left-hand corner. You need administrator rights to change these settings.
- Under ‘Allowed websites’, select ‘Define allowed websites’.
- The window ‘Add the websites you want to allow’ opens.
- To add a website to the list of allowed websites, select the ‘+’ in the lower left-hand corner of the window. Enter the address of the website you wish to allow and press enter. The website will now appear in the list of allowed websites.
- To remove a website from the list of allowed websites, select the relevant website address followed by the ‘-’ in the lower left-hand corner of the window.
- To close the window, click ‘Done’.
Android:
- Open the My Security app.
- In the main screen of the My Security app, select ‘Fraud Protection’.
- Tap ‘Allowed websites’ and then ‘Add allowed website’.
- Enter the address of the website you wish to add and select ‘Allow this website’.
iOS:
- Open the My Security app.
- In the main screen of the My Security app, select ‘Fraud Protection’.
- Select ‘Protection for Safari’.
- Select the ‘Settings’ icon in the top right-hand corner of the screen.
- Tap ‘Allowed websites’ and then ‘Add allowed website’.
- Enter the address of the website you wish to add and select ‘Allow this website’.
How can I restore my master password?
You generated a QR code to restore your master password when you installed the My Security app. Scan this QR code and follow the instructions.
You cannot restore or reset your master password without this QR code.
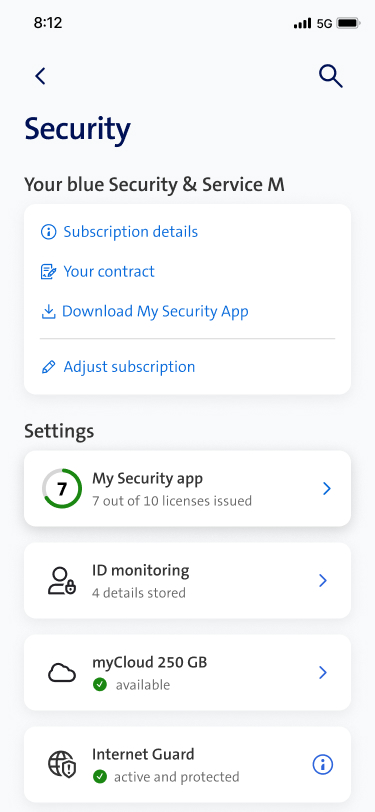
Where can I manage my My Security app?
Devices and licenses can be managed in the My Swisscom App.
Choose your support option

Arrange a callback
The professionals from My Service will support you on the phone (subject to a charge).