Synchronising contacts and setting up phone book
Setting up central phone book
Store your contacts centrally so that you can easily access them on your fixed network phone (HD). The Swisscom central telephone directory stores up to 500 contacts.
With an Internet-Box
Manage your contacts in My Swisscom.(opens in new tab)
Tip: opening the My Swisscom app on your mobile phone lets you transfer your phone contacts easily to your fixed network phone.
With Centro Business 2.0
Synchronise your contacts with the Windows Outlook plug-in or via the macOS address book.
With Smart Business Connect
Synchronise your contacts with the Windows Outlook plug-in or via the macOS address book.
Synchronisation is only from your computer to your phones (one-way synchronisation).
Looking up contacts
If you have set up a central phone book, you can access your saved contacts using a fixed-network telephone.
With an Internet-Box
With an Internet-Box (excluding Internet-Box light), you can:
- access your contacts in the main phone book with the cordless HD-Phone.
- look up contacts from the main phone book with your Yealink T46G/S HD-Phone.
To do this, follow these instructions.
Yealink T46G/S
- Select the menu item “Phone Book” on the screen.
- Look for the required contact by keying in at least one letter.
- This automatically starts the search.
With Centro Business 2.0
With a Centro Business 2.0, you can:
- access your contacts in the main phone book with the cordless HD-Phone.
- look up contacts from the main phone book with your Yealink T46G/S HD-Phone.
To do this, follow these instructions.
Yealink T46G/S:
- Select the menu item “Phone Book” on the screen.
- Look for the required contact by keying in at least one letter.
Smart Business Connect
This is how it works with Smart Business Connect:
- Select the item “Directory” on the screen.
- Go to “Address Book”.
- You’ll see the fist 30 contacts.
- Look for the required contact by keying in at least one letter.
- This automatically starts the search.
Synchronising Outlook contacts
Synchronise your main phone book with Outlook. Your contacts will then all be listed in the Outlook address book as well as on your fixed-network phone book.
Requirements and restrictions
You require Windows 7 (SP1), Windows 8.1 or Windows 10 operating system and Outlook version 2013 or higher. New Outlook is not supported.
Windows Vista, Windows XP and Windows 8 are not supported because .NET Framework 4.8 is set as a minimum requirement. New Outlook is not supported, either.
There is currently no version for Outlook for MacOS.
1. Downloading the plug-in
- Close your Outlook.
- Go to the Plug-in page(opens in new tab)
- Start the download.
- Follow the instructions.
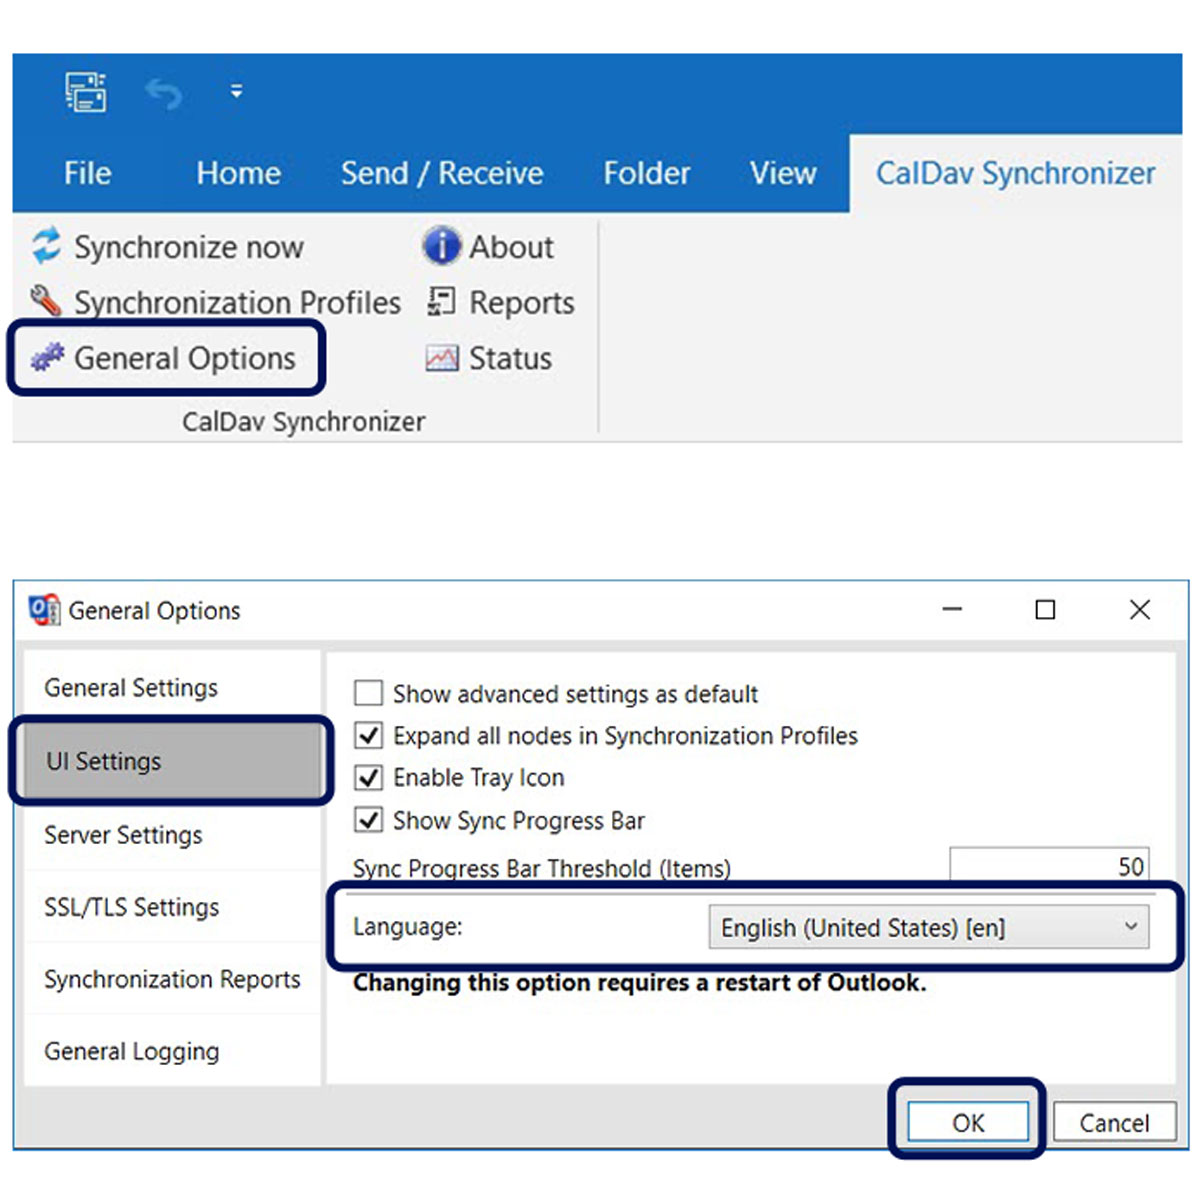
2. Change language
- Open your Outlook.
- Go to the “CalDav Synchronizer” tab.
- Choose “General Options”.
- Go to “UI Settings” and change the language.
- Click OK.
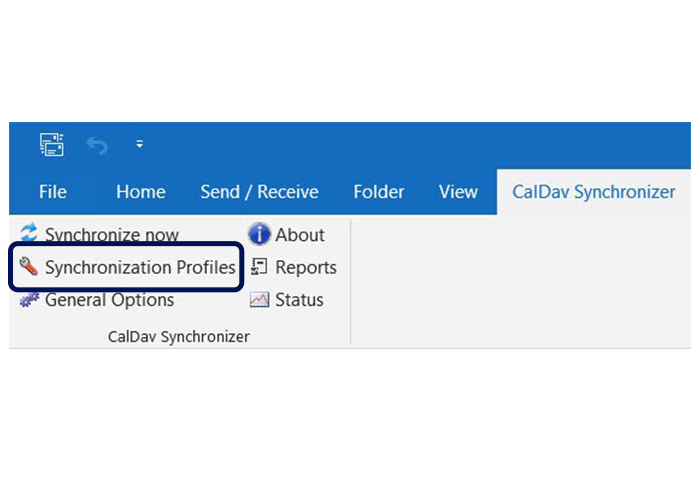
3. Create synchronisation profile
- In Outlook, go to the “CalDav Synchronizer” tab.
- Wählen Sie «Synchronisationsprofile».
- Click on the “+”.
- Continue with step 4.
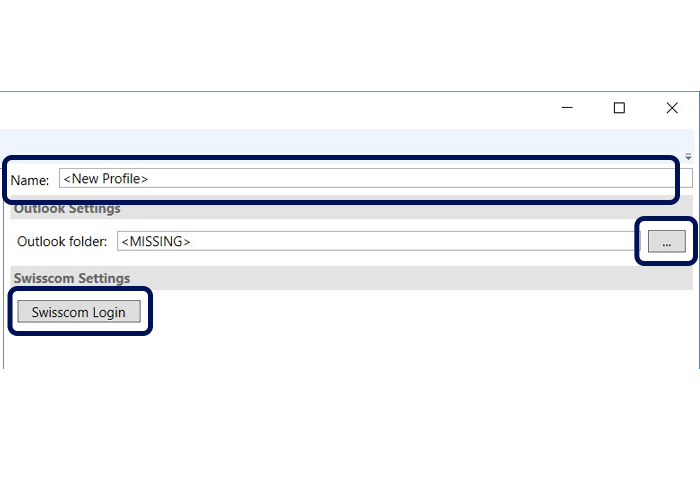
4. Create Swisscom phone book
- Select “Swisscom”.
- Click OK.
- Enter a name for your phone book.
- Select an Outlook folder that you want to use to synchronise the contacts.
- Click on “Swisscom Login”.
- Log in and follow the instructions.
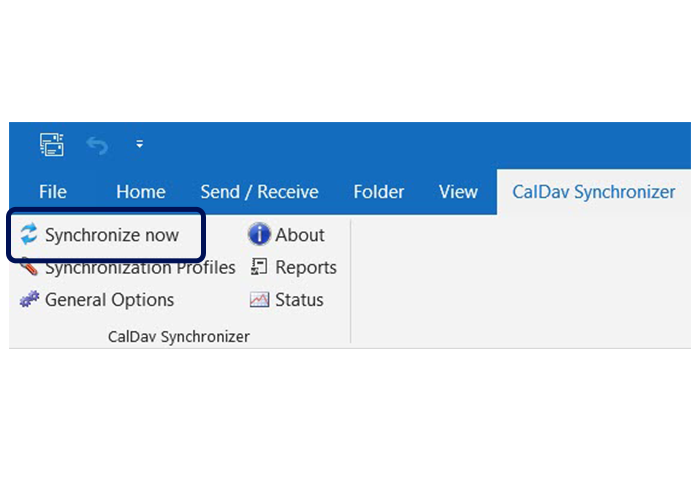
5. Start synchronisation
- In Outlook, go to the “CalDav Synchronizer” tab.
- Important: you should carry out the initial synchronisation with an empty local Outlook folder. Otherwise, duplicate entries may be created during synchronisation.
- Select “Synchronize now”.
Synchronising macOS contacts


Synchronise your central phone book with macOS from Mojave 10.14 or higher or iOS13 or higher Your contacts will then all be listed in the macOS address book as well as on your fixed-network phone.
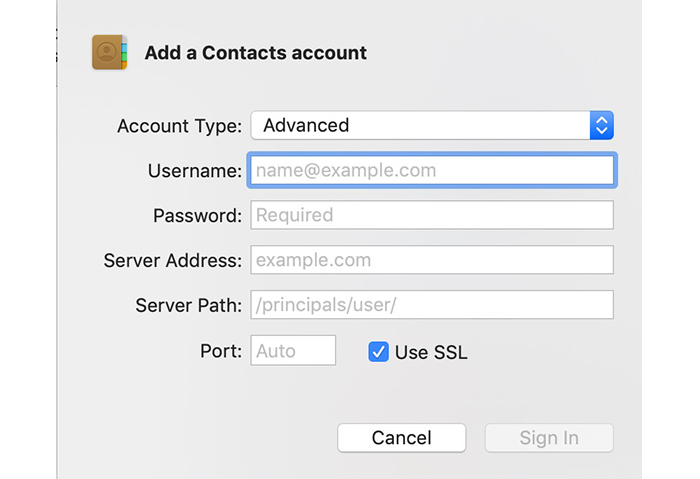
1. Set up CardDav account
- On you macOS device, go to System Settings Internet Accounts.
- Select “Add Account”.
- Select “CardDAV-Account”.
2. Connect with My Swisscom
- Enter the details from My Swisscom(opens in new tab) or the Smart Business Connect portal.
- Click on “Log in”.
Your details will appear in the Smart Business Connect portal as soon as you create a CardDAV account under My business number Personal address book Mac OS.
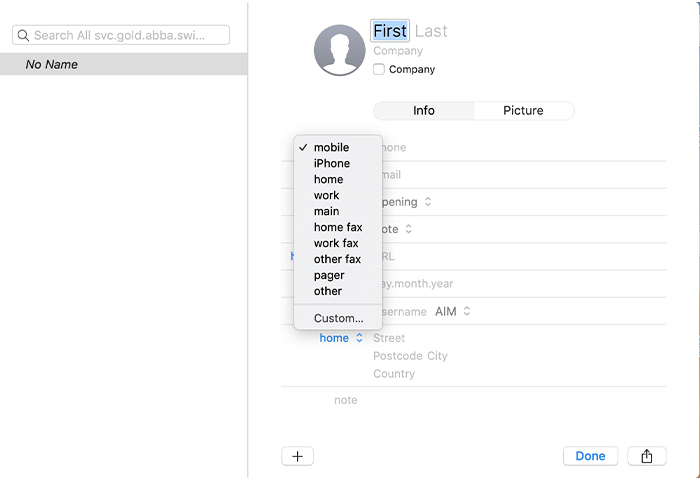
3. Show all Groups
- Open “Contacts” on your macOS device.
- Select Display Show Groups.
- If only “Hide Groups” is available for selection, the display is already correct.
4. Start synchronisation
The following details are now automatically synchronised:
- First name
- Last name
- Mobile
- Private
- Work
Choose your support option
Möchten Sie etwas bestellen? Wir beraten Sie
Manage your products, services and data directly in your account.
Open My Swisscom(opens a new window)
The digital assistant Sam helps you with questions about your Swisscom products.
Start ChatGet personal help from experienced Swisscom customers.
Go to help